Overview
When you build with Applin™, your app will have two parts:
- A frontend that fetches pages from the backend and displays them to the user. To make a frontend, copy an example app and change its name, icon, and server URL.
- A backend server that handles requests for pages and performs actions triggered by the user. To make a backend, use an HTTP server (like Ruby on Rails), import an Applin library, and add request handlers that process user-entered data and return page definitions.
Applin is like ReactNative without JavaScript.
Server-Driven UI
Applin is a Server-Driven User Interface (SDUI). This means that the server code defines app UI content, layout, and behavior.
Traditional app architecture:

Applin app architecture:

Benefits for you as an app maker:
- Frontend code is eliminated. You need to learn, write, and maintain only the backend code. For example, you can use Rails to build and release an iOS app without help from an iOS developer.
- When you deploy the backend, the frontend updates instantly.
- You can delete old APIs right away, since there are no old versions of the app in use.
- You can release features and fix bugs immediately, without waiting for app review.
- When things go wrong, you can immediately roll back your app frontend & backend together.
- Backend tests can exercise UI flows and backend code together. These run on normal test runners, not expensive macOS test runners.
- Get support with GitHub Issues. You can easily find answers.
- The source code is public. You can dig into the code and see how things work.
- PRs are welcome! If you need a bug fixed ASAP, you can fix it and upstream your fix. No need to maintain a fork for more than one release.
- To support a new version of iOS, just rebuild with the latest version of the Applin frontend.
Benefits for your users:
- Users always have the latest version of the app.
- The app starts and runs very fast.
- It uses little battery power. Processing happens on the server.
- It runs on the cheapest devices. The SDUI boilerplate uses little RAM and CPU.
- The app downloads quickly and takes very little space on their device (1.2MB).
Downsides:
- Custom UI elements are not easy to make in Applin.
- Some bad UI designs are impossible to make in Applin. This is a benefit, depending on your perspective.
- Applin is new. All new software has bugs.
- Styling support is still under development.
- The Android frontend is still under development.
- The library of UI elements is still small.
- Applin costs money.
Frontend
When the frontend starts up, it makes an HTTP request to the server for the home page.
It expects to get a JSON response with content-type application/vnd.applin_response.
It parses the response into a page definition.
Then it dynamically creates native iOS (UIKit) objects and composes them to match the page definition.
Later, if the page updates, the frontend gets a new page definition and smoothly updates
the page.
Currently, there is one frontend: iOS Frontend.
Backend
The backend of an Applin app is an HTTP server. It handles these kinds of requests:
- GET requests for pages
- POST requests for pages with user-entered data (text boxes, checkboxes, etc.)
- POST requests triggered by the user (buttons, camera, etc.)
Applin provides libraries for building backend servers. See Backend Libraries.
Applin is not a no-code app builder. You must write backend code.
Frontend
Every Applin app must get page definitions from the backend server and display them. For details, see Frontend-Backend Protocol.
We provide frontend example apps for various platforms. You can copy one of these example apps and change the server URL to point to your server.
iOS Frontend
Applin's iOS frontend is in the ApplinIos library. To use it, we create a boilerplate iOS app and have it call the library on startup.
You can try the iOS frontend right now. Install the Applin Tester app from the App Store and connect to one of the demo backends. See Manual Testing.
Make a New App
- Download https://github.com/leonhard-llc/applin-ios-example
- Open the project in XCode
- Xcode's left-hand panel is a tab view displaying "navigators".
Display the Project Navigator by clicking the left-most icon
or selecting
View > Navigators > Projectfrom the menu. - Change your app's Bundle Identifier
- Click "Applin Example" at the top of Project Navigator
- Click "Applin Example" under "TARGETS"
- Click the "Signing & Capabilities" tab
- Change "Bundle Identifier" from
com.example.Applin-Exampleto an appropriate one for your app. See https://developer.apple.com/documentation/appstoreconnectapi/bundle_ids.
- Change your app's name
- Click "Applin Example" at the top of Project Navigator. Click it again to change it into a text edit box.
- Enter your app's new name and press ENTER.
- "Rename project content items?" appears. Click "Rename".
- Rename the "Applin Example" under "TARGETS"
- Rename the "Applin Example" folder to match your app's name.
- Select your app under "TARGETS", click the "Build Settings" tab, and change "Packaging > Info.plist File"
from
Applin Example/Info.plistto the new path of the file.
- Add your app icon to
Assets > AppIcon - Replace
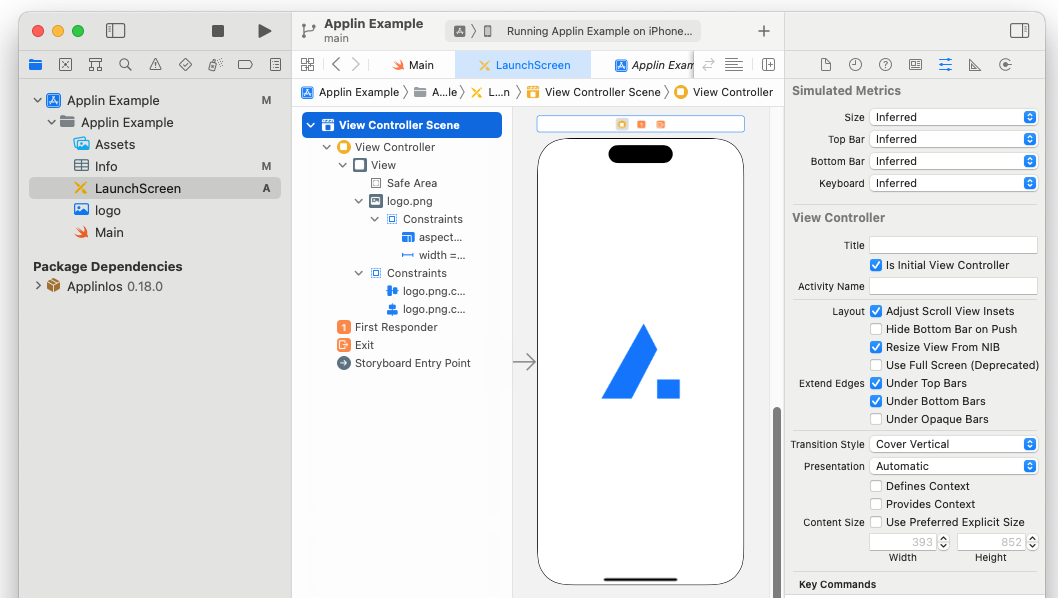
logo.pngwith your app's logoInfo.plist > Launch Screen > Image Nametells UIKit to generate a launch screen that displayslogo.pngin the center. It sizes the image by mapping 1 image pixel to 1 device-independent pixel. To change the logo's size on the screen, use an image editor to change its resolution.- To get more control over the launch screen, use a Storyboard Launch Screen.
- Edit
Main.swift- Check the server URLs
urlForSimulatorBuildsurlForDebugBuilds(for testing the app on your own devices)licenseKey(used by Release builds, contains prod server URL)
- Customize
firstStartupPage - Update your support channels or set them to
nil. These are used inStaticPages.support.statusPageUrlsupportChatUrlsupportEmailAddresssupportSmsTel
- Check the server URLs
- Replace
terms.txtandprivacy.txt
Build and Run
Build your app and run it in Simulator:
- Use the device selector in the XCode bar and select an item under "iOS Simulators".
- To change the available simulated devices, click the menu item "Window > Devices and Simulators".
- Click the "Start the active scheme" button which looks like a triangle
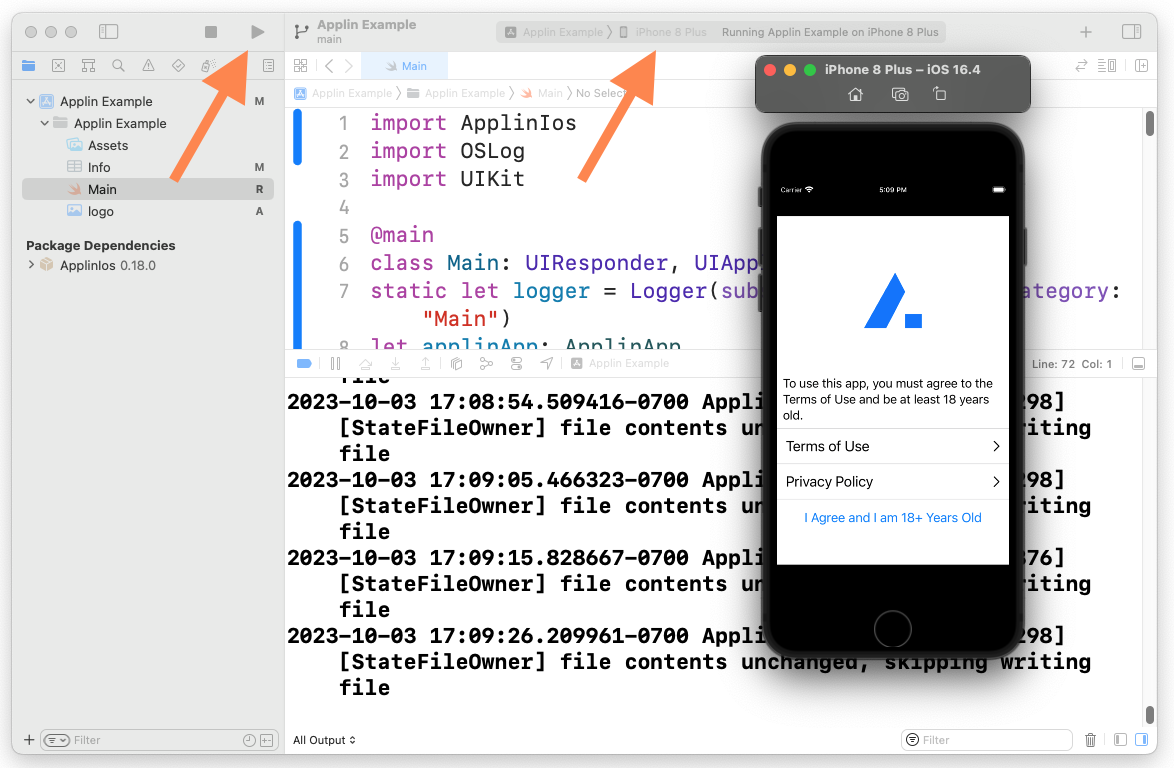
The first time XCode launches an app, it starts very slowly. When you launch an app by tapping the icon, it starts instantly.
Note: Simulator has some slightly differences from real devices. See https://developer.apple.com/documentation/xcode/devices-and-simulator/. Also, Applin has a rendering bug (applin-ios#1) that only appears in Simulator.
If you try to run your app on a physical device and it fails with a signing error, you must complete these steps:
- Create an Apple Developer account
- Pay Apple their annual fee
- Register your device to your Apple Developer account
Note: Release builds require a valid Applin license key. See Releasing.
Android Frontend
Applin's Android frontend is under development and is not yet ready to use.
To get updates on Applin for Android and other announcements, add yourself to https://groups.google.com/g/applin-announce.
Backend Libraries
Every Applin app must have an HTTP server that handles requests from the frontend. For details, see Frontend-Backend Protocol.
We provide libraries to help you make your backend server.
Ruby on Rails
You can write an Applin backend in Rails.
Get Started
- Learn https://rubyonrails.org/
- Create a new Rails project
- Add https://rubygems.org/gems/applin-rails
Routes
The Applin frontend sends GET to load a new page.
When refreshing a page, it sends POST if the page has any user-input widgets.
The request body is a JSON object containing the page's variables.
So all pages with user-input widgets need to handle POST.
When a page has no user-input widgets, the frontend uses GET to refresh the page.
The rpc action also sends POST with the page's variables.
For details, see Frontend-Backend Protocol.
# config/routes.rb
Rails.application.routes.draw do
  # https://guides.rubyonrails.org/routing.html
  get "/healthz", to: proc { [200, {}, ["success"]] }

  # Requests for "/" go to HomeController.index.
  root "home#index"

  # Frontend sends POST when refreshing a page with user-input widgets.
  get "/login_page", to: "login#login_page"
  post "/login_page", to: "login#login_page"

  # Frontend sends POST for RPC action.
  post "/login", to: "login#login"
end
Controllers
Your server must require "applin/rails" which adds the applin format.
Then Rails can recognize Applin requests when it checks the
Accept
header.
Applin is not affected by CSRF attacks.
Rails has automatic CSRF protection for POST requests. We call
protect_from_forgery
to disable it for Applin requests:
# app/controllers/home_controller.rb
class HomeController < ApplicationController
  # Prevent error "ActionController::InvalidAuthenticityToken (Can't verify CSRF token authenticity.)"
  protect_from_forgery with: :exception, if: -> { !request.format.applin? }
end
Rails automatically parses the POST body JSON object and makes it available in the
params
object.
To learn how to handle request parameters, see the Ruby on Rails Guides.
Also see Submitting Data.
Views
Your server can require "applin" and then your views can
call Applin module functions to create pages and widgets.
We recommend using the jbuilder JSON template library.
To display a page in the frontend, your server must return a response with the proper
content-type
header value.
If your view template filename ends in .applin.jbuilder
then Rails will:
- use the JBuilder templating engine to process the template into a response body
- add the Applin content-type header to the response
The response body must be a JSON object with a page entry.
# app/views/home/index.applin.jbuilder
json.page Applin::nav_page(title: "Home Page", poll_seconds: 30) {
  Applin::scroll {
    Applin::column(widgets: [
      Applin::text("text")
    ])
  }
}
Controller-Only
You have the option of defining your pages inside the controller, without view templates.
Use Applin::Rails::send_page and the various functions in the Applin module.
# app/controllers/home_controller.rb
require "applin"
require "applin/rails"

class HomeController < ApplicationController
  include ::Applin
  include ::Applin::Rails
  skip_forgery_protection

  def index
    send_page nav_page(title: "Home Page", poll_seconds: 30) {
      scroll {
        column(widgets: [
          text("text")
        ])
      }
    }
  end
end
Example
https://github.com/leonhard-llc/applin-rails-demo
Rust
Are you considering using Rust? Read this article: Why Rust in Production?.
https://crates.io/crates/applin - We provide this library to help your Rust HTTP server produce Applin pages.
Rust has many HTTP server libraries. Please let us know which one to add next: Feature Requests.
Servlin
You can use the https://crates.io/crates/servlin HTTP server for your Applin backend.
- Enable the
servlinfeature of theapplincrate. - Use the
applin::applin_responsefunction to convert your page definition to aservlin::Responsestruct with the proper content-type and JSON body. Example:#![allow(unused)] fn main() { pub const HELLO_PAGE_KEY: &str = "/hello"; pub fn hello_page() -> Response { applin_response(nav_page("Hello", scroll(form(text("Hello World!"))))) .unwrap() } } - Remember to handle
GETandPOSTfor pages that have input widgets (variables). Example:#![allow(unused)] fn main() { ("GET" | "POST", account::NEW_ACCOUNT_PAGE_KEY) => Ok(account::new_account_page()), }
Example: https://github.com/leonhard-llc/applin-rust-demo
Pages
Page URL
Every page has a relative URL. The app's home page is always /.
See Protocol - Pages and URLs.
Page Stack
The frontend keeps a stack of pages. The top-most page is visible to the user.
The first time the app starts, it starts with only ApplinConfig.showPageOnFirstStartup
url on the stack.
Widget actions can push or pop pages on the stack. The stack cannot become empty.
The frontend saves the page stack. If the OS stops the app, the frontend restores the page stack when the user opens the app again. The frontend also saves and restores user-entered data (text fields, checkboxes, etc.). This means the user can continue using the app where they left-off.
If the user forcefully terminates the app, the frontend erases the page stack. The next time the app starts, it shows the default page:
- If the server previously set a
"session"cookie, then it starts with page/. - Otherwise, it starts with the value of
ApplinConfig.showPageOnFirstStartup.
Page Variables
Some widgets allow the user to enter data or select options. We call them input widgets. For example, text_field and checkbox are input widgets.
Every input widget has a var_name attribute, for variable name.
When the page refreshes or performs an RPC action, the frontend sends the page's variables to the backend in a JSON object HTTP POST body. See Protocol.
The frontend saves variables values in a single dictionary for all pages.
Widgets on different pages can use the same var_name and they will show the same data.
Static Pages
Static pages are defined in frontend code.
- iOS examples: https://github.com/leonhard-llc/applin-ios/blob/main/Sources/ApplinIos/StaticPages.swift
Refresh
The user can refresh the page by:
- Pulling down on a scroll widget
- Activating a widget with a poll action
The page refreshes smoothly.
# Ruby
nav_page(title: "Inert") {
  scroll {
    form(widgets: [
      text("This page updates when you load or refresh it (pull to refresh)."),
      text(Time.new.strftime("%Y-%m-%d %H:%M:%S")),
    ])
  }
}
#![allow(unused)]
fn main() {
nav_page(
    "Inert",
    scroll(form((
        text("This page updates when you load or refresh it (pull to refresh)."),
        text(format!("{:?}", SystemTime::now())),
    ))),
)
}
Polling
Pages with the poll_seconds option will automatically refresh.
The page refreshes smoothly, even while the user is typing on the keyboard.
# Ruby
nav_page(title: "Polled", poll_seconds: 2) {
  scroll {
    form(widgets: [
      text("This page updates automatically every 2 seconds."),
      text(Time.new.strftime("%Y-%m-%d %H:%M:%S")),
    ])
  }
}
#![allow(unused)]
fn main() {
// Rust
nav_page(
    "Polled",
    scroll(form((
        text("This page updates automatically every 2 seconds."),
        text(format!("{:?}", SystemTime::now())),
    ))),
)
.with_poll(2),
}
Nav Page
Nav pages show a navigation bar at the top with the page title. They can also show a "Back" button.
Attributes:
widget: Widget- Required
- The widget to display on the page
title: "Page One"- Required
- Displayed in the navigation bar
- Available to analytics tools through UIKit
UIViewController.title
poll_seconds: n- Page silently refreshes every
nseconds, when the app is in the foreground. - Page silently refreshes when the user switches to the app.
- Page silently refreshes every
start: widget- Replaces the default back button with a custom back_button.
- Set this to the empty widget to remove the back button.
- On iOS, setting this widget disables the swipe-back gesture. This is because of bugs in Apple's UIKit.
ephemeral: true- For static pages only.
- When the user terminates the app and starts it again, do not restore this page or any subsequent pages in the stack. This is useful for error pages.
Example
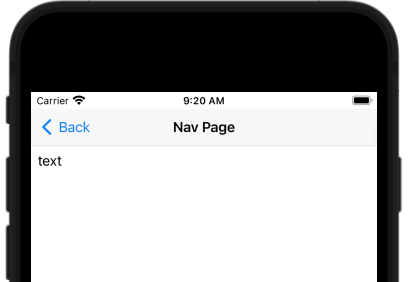
# Ruby
nav_page(title: "Nav Page") {
  scroll(form(widgets: [
    text("text")
  ]))
}
#![allow(unused)]
fn main() {
// Rust
nav_page("Nav Page", scroll(form((
    text("text"),
))))
}
Home Page
When a nav page is the only page on the stack, it doesn't show a Back button.

# Ruby
nav_page(title: "Home Page", poll_seconds: 30) {
  scroll {
    column(widgets: [
      text("text")
    ])
  }
}
#![allow(unused)]
fn main() {
// Rust
nav_page("Home Page", scroll(form((
    text("text"),
))))
.with_poll(30)
}
Removed Back Button
To remove the back button,
set the nav page's start attribute to the empty widget.
The user may become frustrated. See section 3 "User control and freedom" of Nielsen Norman's 10 Usability Heuristics for User Interface Design.
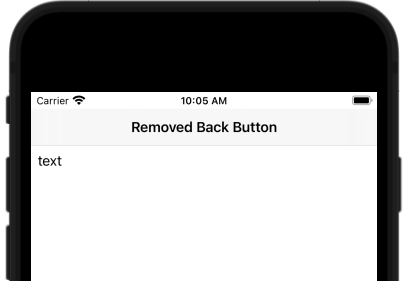
# Ruby
nav_page(title: "Removed Back Button", start: empty) {
  scroll {
    column(widgets: [
      text("text"),
    ])
  }
}
#![allow(unused)]
fn main() {
// Rust
nav_page("Removed Back Button", scroll(column((
    text("text"),
))))
.with_empty_start()
}
Plain Page
Plain pages are good for the home screen, since they do not display title bar or "Back" button.
Attributes:
widget: Widget- Required
- The widget to display on the page
title: "Page One"- Available to analytics tools through UIKit
UIViewController.title
- Available to analytics tools through UIKit
poll_seconds: n- Page silently refreshes every
nseconds, when the app is in the foreground. - Page silently refreshes when the user switches to the app.
- Page silently refreshes every
ephemeral: true- For static pages only.
- When the user terminates the app and starts it again, do not restore this page or any subsequent pages in the stack. This is useful for error pages.
Example

# Ruby
plain_page(title: "Home Page", poll_seconds: 30) {
  scroll {
    column(widgets: [
      text("text"),
    ])
  }
}
#![allow(unused)]
fn main() {
// Rust
nav_page("Home Page", scroll(column((
    text("text"),
))))
.with_poll(30)
}
Widgets
A widget is a UI element like a button or text label. Some widgets are used for layout, like column and form.
Do you need a widget that's not here? Please let us know: Feature Requests.
back_button Widget
Use a back button widget to customize the back button of a nav_page.
Assign the widget to the start attribute of the nav page.
Back button widgets cannot appear anywhere else.
Attributes:
actions: [action]- Required
- A list of actions to perform when the user taps the back button.
- When the list is empty, the button is disabled.
RPC Example
In this example, the back button performs an rpc action.
If the RPC fails, the page will not pop. The user may become frustrated and stuck. See section 3 "User control and freedom" of Nielsen Norman's 10 Usability Heuristics for User Interface Design.
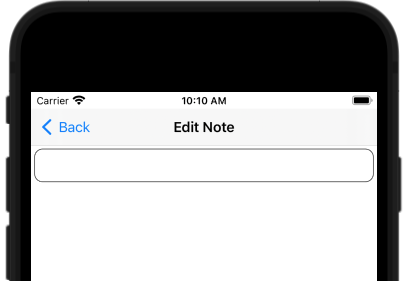
# Ruby
nav_page(
    title: "Edit Note",
    start: back_button(actions: [rpc("/save_note"), pop]),
  ) {
  scroll {
    column(widgets: [
      textfield(var_name: "note"),
    ])
  }
}
#![allow(unused)]
fn main() {
// Rust
nav_page("Edit Note", scroll(column(textfield("note"))))
.with_start(back_button([rpc("/save_note"), pop()]))
}
Disabled
To disable the back button, set the actions to an empty list.
The user may become frustrated. See section 3 "User control and freedom" of Nielsen Norman's 10 Usability Heuristics for User Interface Design.
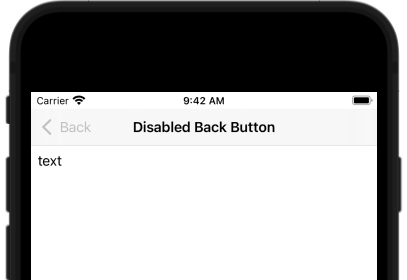
# Ruby
nav_page(title: "Disabled Back Button", start: back_button(actions: [])) {
  scroll {
    column(widgets: [
      text("text"),
    ])
  }
}
#![allow(unused)]
fn main() {
// Rust
nav_page("Removed Back Button", scroll(form(text("text"))))
.with_start(back_button([]))
}
button Widget
The user can tap a button widget to perform a list of actions.
Attributes:
text: "My Button"- Required
- Text to display on the button
- Must contain a non-whitespace symbol
actions: [action]- A list of actions to perform when the user taps the button
- When the list is empty, the button is disabled.
Example
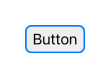

# Ruby
button(text: "Button", actions: [rpc("/add_item"), pop])
#![allow(unused)]
fn main() {
// Rust
button("Button", [rpc("/add_item"), pop()])
}
Many Words

# Ruby
button(
  text: "MMMM MMMM MMMM MMMM MMMM MMMM MMMM MMMM MMMM MMMM MMMM MMMM MMMM MMMM",
  actions: [rpc("/add_item"), pop]),
)
Long Word

# Ruby
button(
  text: "MMMMMMMMMMMMMMMMMMMMMMMMMMMMMMMMMMMMMMMMMMMMMMMMMMMMMMMMMMMMMMMMMMMMM",
  actions: [rpc("/add_item"), pop]),
)
Disabled
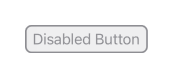
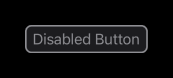
# Ruby
button(text: "Disabled Button", actions: [])
#![allow(unused)]
fn main() {
// Rust
button("Disabled Button", [])
}
checkbox Widget
A checkbox widget to displays the value of a boolean (true or false) variable. The user can tap the widget to toggle the value of the variable.
Attributes:
var_name: "var1- Variable name
- Required
actions: [action]- A list of actions to perform when the user taps the button
- When the list is empty, the button is disabled.
initial_bool: true- The initial value of the variable, if the variable is unset.
poll_delay_ms: 0- Poll (update) the page immediately when the user changes the checkbox state.
- Use this for search boxes.
poll_delay_ms: N- Poll (update) the page after the user changes the checkbox state and N milliseconds passes.
- Use this to validate selections and show warnings.
text: "Label1- A label to display next to the checkbox.
Example
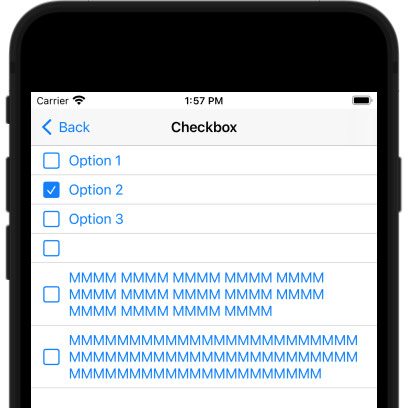
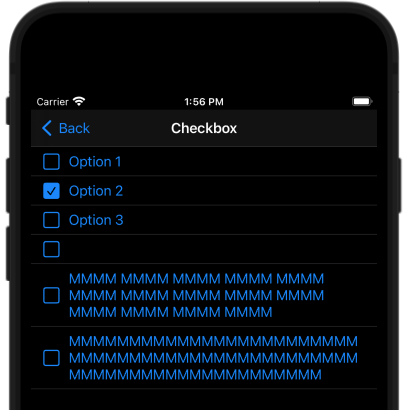
# Ruby
nav_page(title: "Checkbox") {
  scroll {
    form(widgets: [
      checkbox(text: "Option 1", var_name: "option_1"),
      checkbox(text: "Option 2", var_name: "option_2", initial_bool: true),
      checkbox(text: "Option 3", var_name: "option_3", rpc: "/ok"),
      checkbox(text: "", var_name: "no_label"),
      checkbox(
        text: "MMMM MMMM MMMM MMMM MMMM MMMM MMMM MMMM MMMM MMMM MMMM MMMM MMMM MMMM",
        var_name: "many_words",
      ),
      checkbox(
        text: "MMMMMMMMMMMMMMMMMMMMMMMMMMMMMMMMMMMMMMMMMMMMMMMMMMMMMMMMMMMMMMMMMMMMM",
        var_name: "long_word",
      ),
      checkbox(text: "Polls page", var_name: "poll", actions: [Applin::poll]),
      checkbox(
        text: "Polls page after 1 second delay",
        var_name: "poll_delay",
        poll_delay_ms: 1000,
      ),
    ])
  }
}
#![allow(unused)]
fn main() {
// Rust
nav_page(
    "Checkbox",
    scroll(form((
        checkbox("option_1").with_text("Option 1"),
        checkbox("option_2").with_text("Option 2").with_initial_bool(true),
        checkbox("option_3").with_text("Option 3").with_rpc("/ok"),
        checkbox("no_label"),
        checkbox("many_words")
            .with_text("MMMM MMMM MMMM MMMM MMMM MMMM MMMM MMMM MMMM MMMM MMMM MMMM MMMM MMMM"),
        checkbox("long_word")
            .with_text("MMMMMMMMMMMMMMMMMMMMMMMMMMMMMMMMMMMMMMMMMMMMMMMMMMMMMMMMMMMMMMMMMMMMM"),
        checkbox("polls")
            .with_text("Polls page")
            .with_poll_delay(Duration::ZERO),
        checkbox("poll_delay")
            .with_text("Polls page after 1 second delay")
            .with_poll_delay(Duration::from_secs(1)),
    ))),
)
}
column Widget
A column arranges its child widgets in a vertical column.
Attributes:
widgets: [Widget]- Required
- Widgets to display, in order starting with the top
- May be empty
alignment: "start"- Align widgets with the left side of the column widget.
- Default
alignment: "center"- Align widgets with the center of the column widget.
alignment: "end"- Align widgets with the right side of the column widget.
spacing: n- Separate widgets by
Ndevice-independent pixels
- Separate widgets by
Example
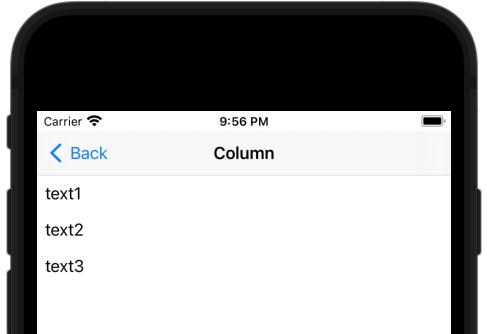
# Ruby
nav_page(title: "Column") {
  scroll {
    column(widgets: [
      text("text1"),
      text("text2"),
      text("text3"),
    ])
  }
}
#![allow(unused)]
fn main() {
// Rust
nav_page(
    "Column",
    scroll(column((text("text1"), text("text2"), text("text3")))),
)
}
Other Options
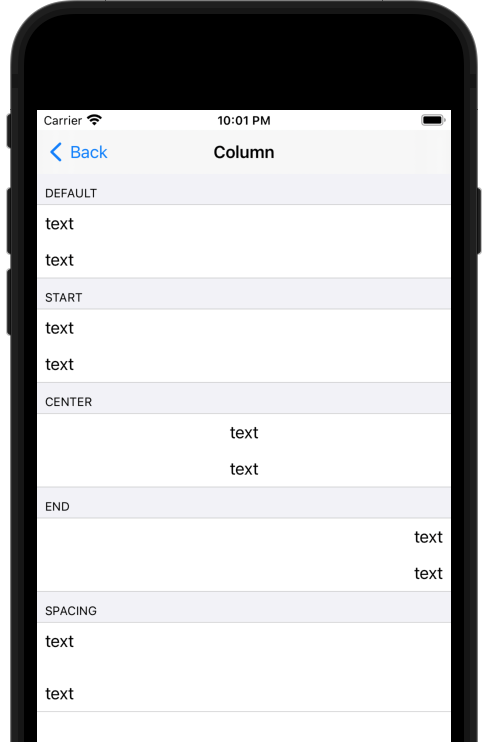
# Ruby
nav_page(title: "Column") {
  scroll {
    column(widgets: [
      form_section(title: "Default", widgets: [
        column(widgets: [
          text("text"),
          text("text"),
        ])
      ]),
      form_section(title: "Start", widgets: [
        column(align: ALIGN_START, widgets: [
          text("text"),
          text("text"),
        ])
      ]),
      form_section(title: "Center", widgets: [
        column(align: ALIGN_CENTER, widgets: [
          text("text"),
          text("text"),
        ])
      ]),
      form_section(title: "End", widgets: [
        column(align: ALIGN_END, widgets: [
          text("text"),
          text("text"),
        ])
      ]),
      form_section(title: "Spacing", widgets: [
        column(spacing: 16.0, widgets: [
          text("text"),
          text("text"),
        ])
      ]),
    ])
  }
}
#![allow(unused)]
fn main() {
// Rust
nav_page(
    "Column",
    scroll(column((
        form_section("Default", column((text("text"), text("text")))),
        form_section(
            "Start",
            column((text("text"), text("text"))).with_alignment(HAlignment::Start),
        ),
        form_section(
            "Center",
            column((text("text"), text("text"))).with_alignment(HAlignment::Center),
        ),
        form_section(
            "End",
            column((text("text"), text("text"))).with_alignment(HAlignment::End),
        ),
        form_section(
            "Spacing",
            column((text("text"), text("text"))).with_spacing(16),
        ),
    ))),
)
}
empty Widget
The empty widget is invisible and takes no space.
Example
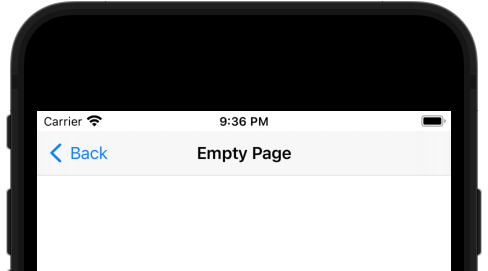
# Ruby
nav_page(title: "Empty Page") { empty }
#![allow(unused)]
fn main() {
// Rust
nav_page("Empty Page", empty())
}
error_text Widget
An error_text widget displays a message to the user with a warning icon.
Attributes:
text: "Message1- Required
- A message to display.
Example
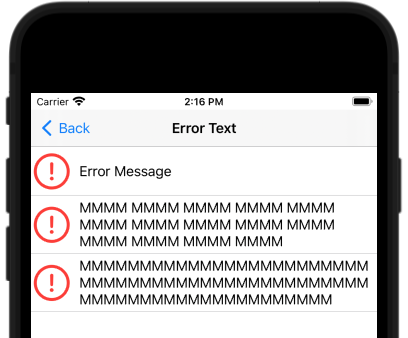
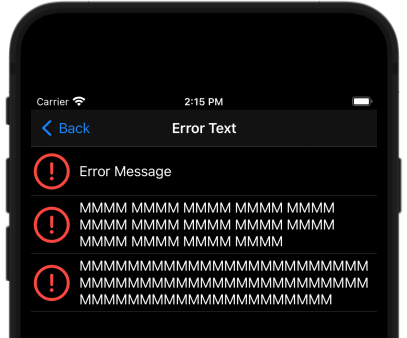
# Ruby
error_text("Error Message")
#![allow(unused)]
fn main() {
// Rust
error_text("Error Message")
}
form Widget
A form arranges its child widgets in a vertical column, separated by horizontal lines.
Attributes:
widgets: [Widget]- Required
- Widgets to display, in order starting with the top
- May be empty
Example
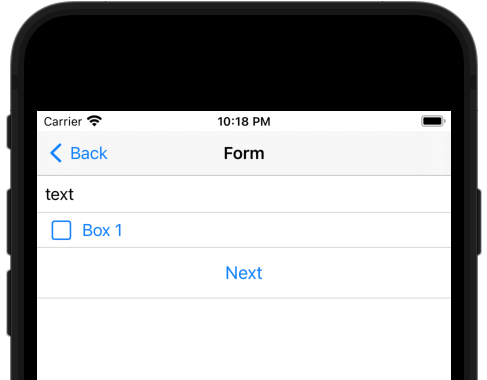
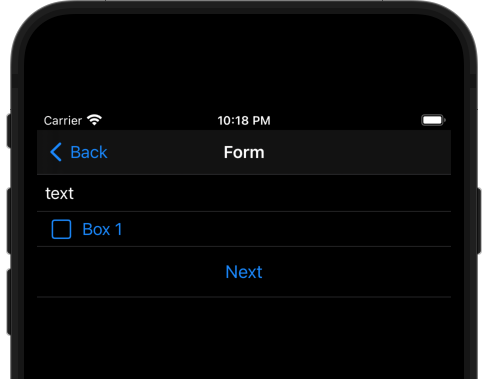
# Ruby
nav_page(title: "Form") {
  scroll {
    form(widgets: [
      text("text"),
      checkbox(var_name: "box1", text: "Box 1"),
      form_button(text: "Next", actions: [rpc("/next"), push("/page2")]),
    ])
  }
}
#![allow(unused)]
fn main() {
// Rust
nav_page(
    "Form",
    scroll(form((
        text("text"),
        checkbox("box1").with_text("Box 1"),
        form_button("Next", [rpc("/next"), push("/page2")]),
    ))),
)
}
form_button Widget
The user can tap a form_button widget to perform a list of actions.
Attributes:
text: "My Button"- Required
- Text to display on the button
- Must contain a non-whitespace symbol
actions: [action]- A list of actions to perform when the user taps the back button
- When the list is empty, the button is disabled.
Example
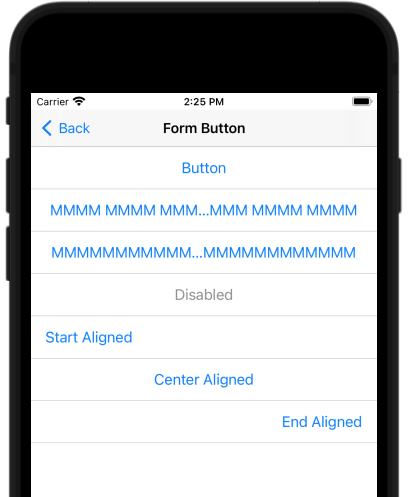
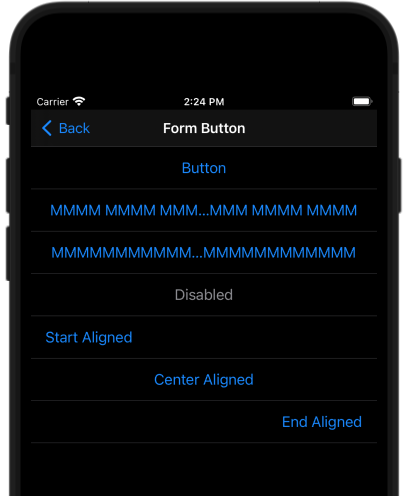
# Ruby
nav_page(title: "Form Button") {
  scroll {
    form(widgets: [
      form_button(text: "Button", actions: [rpc("/add_item"), pop]),
      form_button(
        text: "MMMM MMMM MMMM MMMM MMMM MMMM MMMM MMMM MMMM MMMM MMMM MMMM MMMM MMMM",
        actions: [rpc("/add_item"), pop],
      ),
      form_button(
        text: "MMMMMMMMMMMMMMMMMMMMMMMMMMMMMMMMMMMMMMMMMMMMMMMMMMMMMMMMMMMMMMMMMMMMM",
        actions: [rpc("/add_item"), pop],
      ),
      form_button(text: "Disabled", actions: []),
      form_button(
        text: "Start Aligned",
        actions: [rpc("/add_item"), pop],
        align: ALIGN_START,
        ),
      form_button(
        text: "Center Aligned",
        actions: [rpc("/add_item"), pop],
        align: ALIGN_CENTER,
      ),
      form_button(
        text: "End Aligned",
        actions: [rpc("/add_item"), pop],
        align: ALIGN_END,
      ),
    ])
  }
}
#![allow(unused)]
fn main() {
// Rust
nav_page(
    "Form Button",
    scroll(form((
        form_button("Button", [rpc("/add_item"), pop()]),
        form_button(
            "MMMM MMMM MMMM MMMM MMMM MMMM MMMM MMMM MMMM MMMM MMMM MMMM MMMM MMMM",
            [rpc("/add_item"), pop()],
        ),
        form_button(
            "MMMMMMMMMMMMMMMMMMMMMMMMMMMMMMMMMMMMMMMMMMMMMMMMMMMMMMMMMMMMMMMMMMMMM",
            [rpc("/add_item"), pop()],
        ),
        form_button("Disabled", []),
        form_button("Start Aligned", [rpc("/add_item"), pop()]).with_align(HAlignment::Start),
        form_button("Center Aligned", [rpc("/add_item"), pop()]).with_align(HAlignment::Center),
        form_button("End Aligned", [rpc("/add_item"), pop()]).with_align(HAlignment::End),
    ))),
)
}
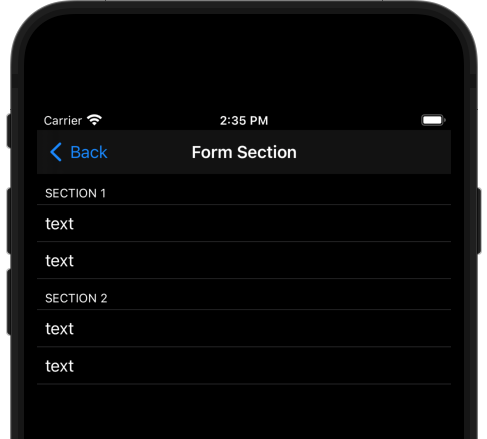
form_section Widget
A form_section widget shows a labeled grouping of widgets.
Attributes:
widgets: [Widget]- Required
- A list of widgets to display
title: "Section 1"- A text label
Example
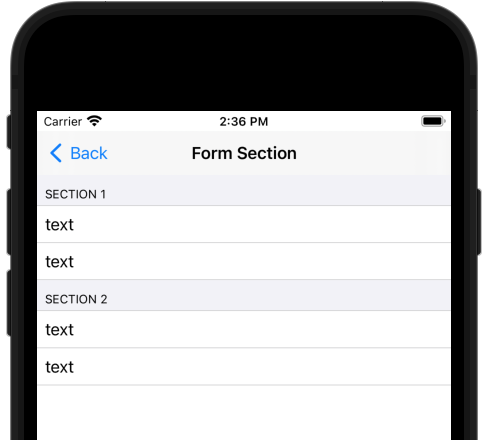
# Ruby
nav_page(title: "Form Section") {
  scroll {
    column(widgets: [
      form_section(title: "Section 1", widgets: [text("text"), text("text")]),
      form_section(title: "Section 2", widgets: [text("text"), text("text")]),
    ])
  }
}
#![allow(unused)]
fn main() {
// Rust
nav_page(
    "Form Section",
    scroll(column((
        form_section("Section 1", (text("text"), text("text"))),
        form_section("Section 2", (text("text"), text("text"))),
    ))),
)
}
grouped_row_table Widget
A grouped_row_table displays widgets in a grid. It can display separate groups of rows.
Attributes:
widgets: [Widget]- Required
- A list of widgets to display
spacing: n- Separate widgets by
Ndevice-independent pixels
- Separate widgets by
Example
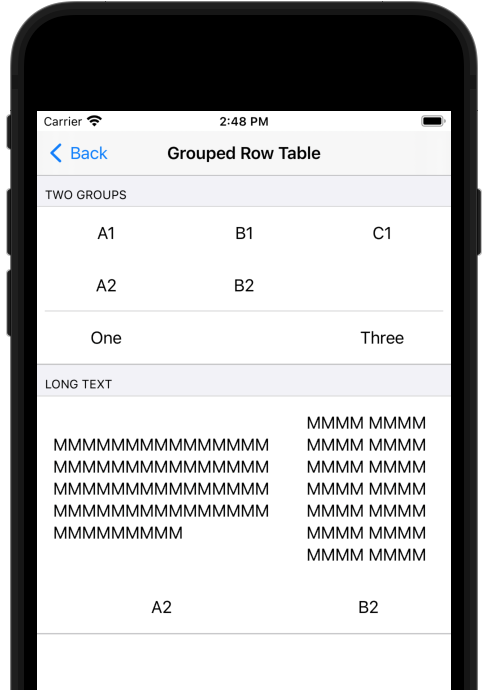
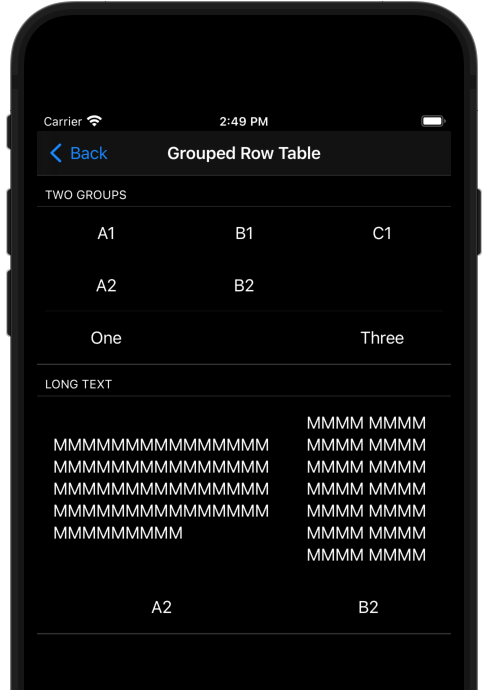
# Ruby
nav_page(title: "Grouped Row Table") {
  scroll {
    form(widgets: [
      form_section(title: "Two Groups", widgets: [
        grouped_row_table(spacing: 8, row_groups: [
          [
            [text("A1"), text("B1"), text("C1")],
            [text("A2"), text("B2"), nil],
          ],
          [
            [text("One"), nil, text("Three")],
          ],
        ]),
      ]),
      form_section(title: "Long text", widgets: [
        grouped_row_table(spacing: 8, row_groups: [
          [
            [
              text("MMMMMMMMMMMMMMMMMMMMMMMMMMMMMMMMMMMMMMMMMMMMMMMMMMMMMMMMMMMMMMMMMMMMM"),
              text("MMMM MMMM MMMM MMMM MMMM MMMM MMMM MMMM MMMM MMMM MMMM MMMM MMMM MMMM"),
            ],
            [text("A2"), text("B2")],
          ],
        ]),
      ]),
    ])
  }
}
#![allow(unused)]
fn main() {
// Rust
nav_page(
    "Grouped Row Table",
    scroll(form((
        form_section(
            "Two Groups",
            grouped_row_table((
                (
                    (text("A1"), text("B1"), text("C1")),
                    (text("A2"), text("B2"), None),
                ),
                ((text("One"), None, text("Three")),),
            ))
            .with_spacing(8),
        ),
        form_section(
            "Long text",
            grouped_row_table(((
                (
                    text("MMMMMMMMMMMMMMMMMMMMMMMMMMMMMMMMMMMMMMMMMMMMMMMMMMMMMMMMMMMMMMMMMMMMM"),
                    text("MMMM MMMM MMMM MMMM MMMM MMMM MMMM MMMM MMMM MMMM MMMM MMMM MMMM MMMM"),
                ),
                (text("A2"), text("B2")),
            ),))
            .with_spacing(8),
        ),
    ))),
)
}
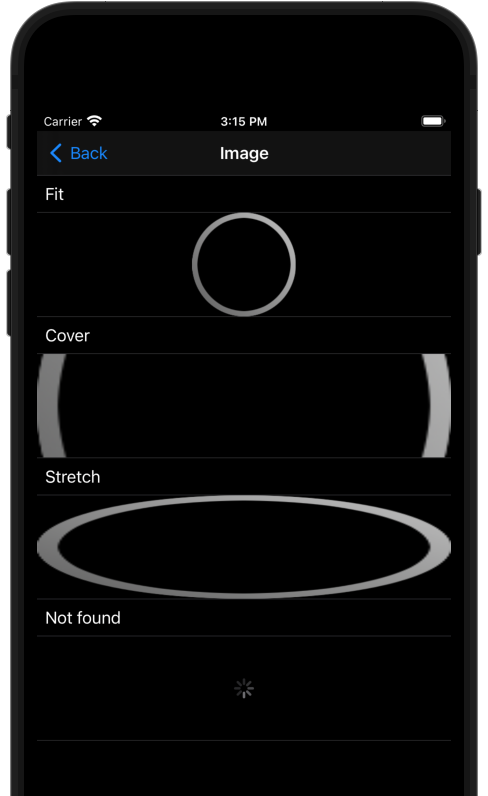
image Widget
A image displays widgets in a grid. It can display separate groups of rows.
Attributes:
aspect_ratio: 4.0- Required
- The aspect ratio of the image widget.
- This is the width divided by the height.
url: "/image.png"- Required
- URL of the image to fetch and display. This may be a relative URL like "/image.png" or an absolute URL on any server like "https://example.com/image.png".
- The iOS frontend supports PNG and JPEG file formats.
disposition: "fit"- Display the image as large as possible while still being entirely visible.
disposition: "cover"- Expand the image so the entire widget is covered by the image, without stretching the image.
- May cut off the edges of the image.
disposition: "stretch"- Make the image fill the widget, stretching it as needed.
Example
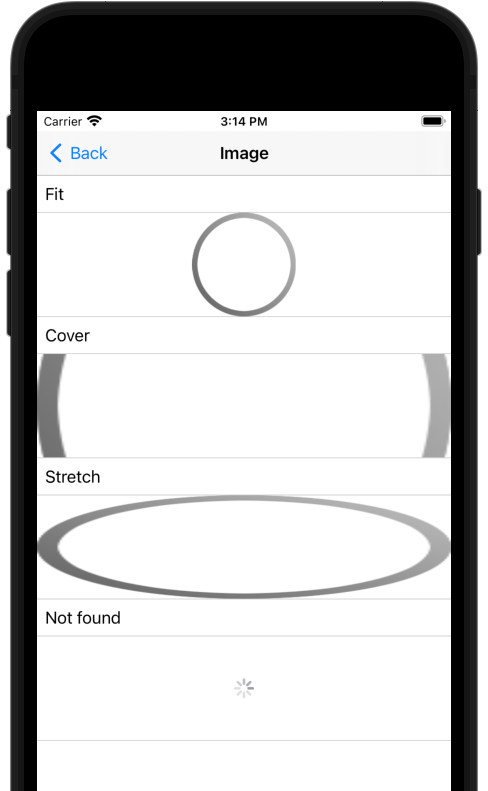
# Ruby
nav_page(title: "Image") {
  scroll {
    form(widgets: [
      text("Fit"),
      image(
        aspect_ratio: 4.0,
        url: "/image.png",
        disposition: DISPOSITION_FIT,
      ),
      text("Cover"),
      image(
        aspect_ratio: 4.0,
        url: "/image.png",
        disposition: DISPOSITION_COVER,
      ),
      text("Stretch"),
      image(
        aspect_ratio: 4.0,
        url: "/image.png",
        disposition: DISPOSITION_STRETCH,
      ),
      text("Not found"),
      image(
        aspect_ratio: 4.0,
        url: "/nonexistent",
        disposition: DISPOSITION_FIT,
      ),
    ])
  }
}
#![allow(unused)]
fn main() {
// Rust
nav_page(
    "Image",
    scroll(form((
        text("Fit"),
        image(Disposition::Fit, 4.0, "/image.png"),
        text("Cover"),
        image(Disposition::Cover, 4.0, "/image.png"),
        text("Stretch"),
        image(Disposition::Stretch, 4.0, "/image.png"),
        text("Not found"),
        image(Disposition::Fit, 4.0, "/nonexistent"),
    ))),
)
}
last_error_text Widget
A last_error_text widget displays the text details of the most recent error.
Use this widget in static error detail pages.
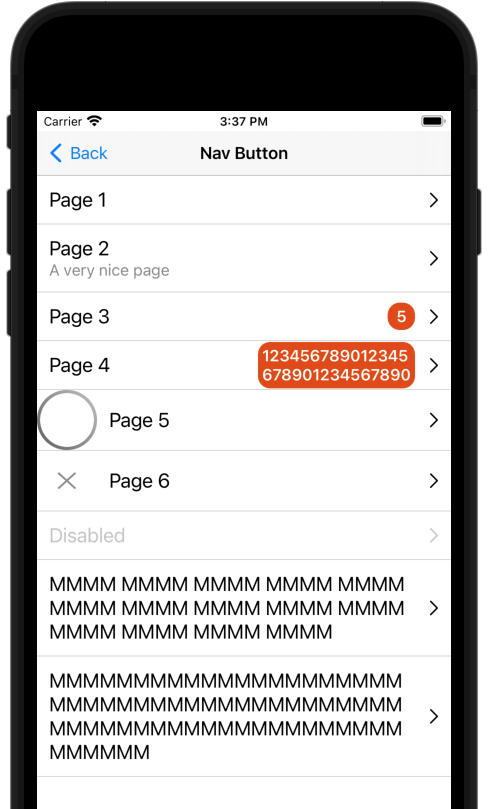
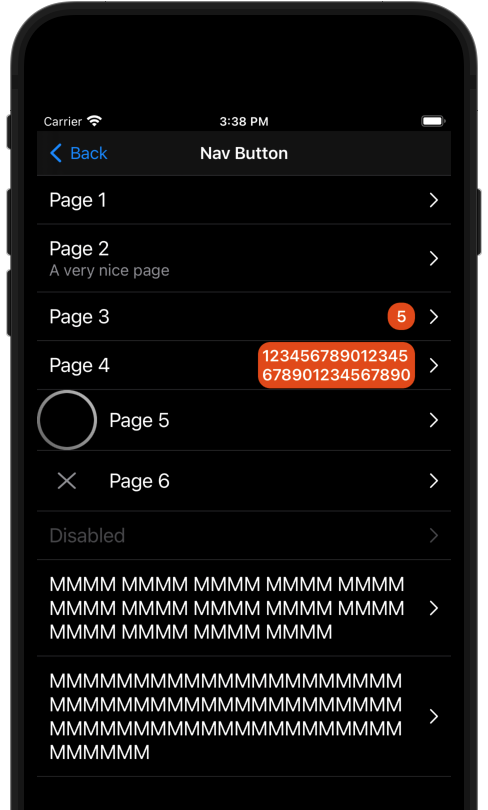
nav_button Widget
The user can tap a nav_button widget to perform a list of actions.
The button has a chevron "⟩" symbol. Users expect the button to navigate to another page.
Attributes:
text: "Page 1"- Required
- Text to display on the button
- Must contain a non-whitespace symbol
sub_text: "Some info about Page 1."- Text to display under the main text.
actions: [action]- A list of actions to perform when the user taps the button
- When the list is empty or missing, the button is disabled.
badge_text: "5"- Text to display in a badge on the button.
photo_url: "/image.png"- URL of an image to fetch and display. This may be a relative URL like "/image.png" or an absolute URL on any server like "https://example.com/image.png".
- The iOS frontend supports PNG and JPEG file formats.
Example
# Ruby
nav_page(title: "Nav Button") {
  scroll {
    form(widgets: [
      nav_button(text: "Page 1", actions: [push("/p1")]),
      nav_button(
        text: "Page 2",
        sub_text: "A very nice page",
        actions: [push("/p2")],
      ),
      nav_button(text: "Page 3", badge_text: "5", actions: [push("/p3")]),
      nav_button(
        text: "Page 4",
        badge_text: "123456789012345678901234567890",
        actions: [push("/p4")],
      ),
      nav_button(
        text: "Page 5",
        photo_url: "/image.png",
        actions: [push("/p5")],
      ),
      nav_button(
        text: "Page 6",
        photo_url: "/nonexistent.png",
        actions: [push("/p6")],
      ),
      nav_button(text: "Disabled", actions: []),
      nav_button(
        text: "MMMM MMMM MMMM MMMM MMMM MMMM MMMM MMMM MMMM MMMM MMMM MMMM MMMM MMMM",
        actions: [push("/mmmm_mmmm")],
      ),
      nav_button(
        text: "MMMMMMMMMMMMMMMMMMMMMMMMMMMMMMMMMMMMMMMMMMMMMMMMMMMMMMMMMMMMMMMMMMMMM",
        actions: [push("/mmmmmmmm")],
      ),
    ])
  }
}
#![allow(unused)]
fn main() {
// Rust
nav_page(
    "Nav Button",
    scroll(form((
        nav_button("Page 1", [push("/p1")]),
        nav_button("Page 2", [push("/p2")]).with_sub_text("A very nice page"),
        nav_button("Page 3", [push("/p3")]).with_badge_text("5"),
        nav_button("Page 4", [push("/p4")]).with_badge_text("123456789012345678901234567890"),
        nav_button("Page 5", [push("/p5")]).with_photo_url(PLACEHOLDER_IMAGE_KEY),
        nav_button("Page 6", [push("/p6")]).with_photo_url("/nonexistent.png"),
        nav_button("Disabled", []),
        nav_button(
            "MMMM MMMM MMMM MMMM MMMM MMMM MMMM MMMM MMMM MMMM MMMM MMMM MMMM MMMM",
            [push("/mmmm_mmmm")],
        ),
        nav_button(
            "MMMMMMMMMMMMMMMMMMMMMMMMMMMMMMMMMMMMMMMMMMMMMMMMMMMMMMMMMMMMMMMMMMMMM",
            [push("/mmmmmmmm")],
        ),
    ))),
)
}
scroll Widget
A scroll Widget displays a child widget. When the child widget is taller than the available space, the user can drag on the widget to scroll it.
The user can also drag down to poll the page. This function is known as "pull to refresh".
Attributes:
widget: Widget- Required
- The widget to display inside the scroll widget
pull_to_refresh: true- Set to
falseto disable the pull-to-refresh function.
- Set to
Example
# Ruby
nav_page(title: "Inert") {
  scroll {
    form(widgets: [
      text("This page updates when you load or refresh it (pull to refresh)."),
      text(Time.new.strftime("%Y-%m-%d %H:%M:%S")),
    ])
  }
}
#![allow(unused)]
fn main() {
nav_page(
    "Inert",
    scroll(form((
        text("This page updates when you load or refresh it (pull to refresh)."),
        text(format!("{:?}", SystemTime::now())),
    ))),
)
}
table Widget
Coming soon...
text Widget
A text widget displays a message to the user.
Attributes:
text: "Message1- Required
- A message to display.
Example
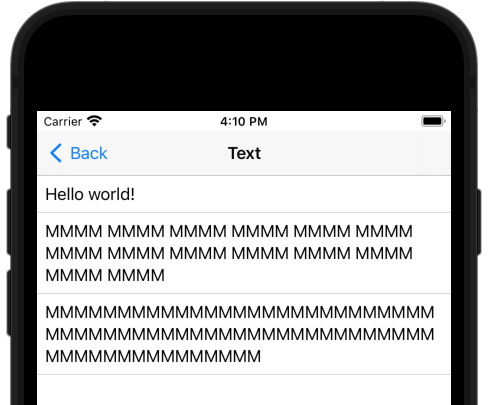
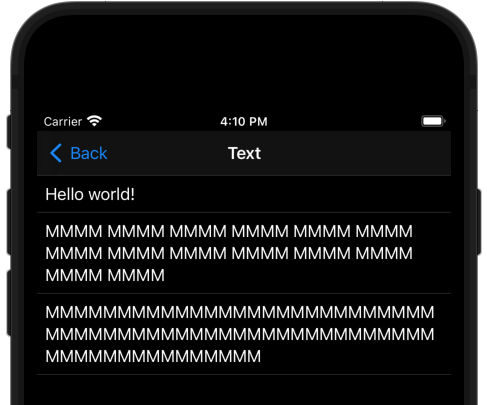
# Ruby
nav_page(title: "Text") {
  scroll {
    form(widgets: [
      text("Hello world!"),
      text("MMMM MMMM MMMM MMMM MMMM MMMM MMMM MMMM MMMM MMMM MMMM MMMM MMMM MMMM"),
      text("MMMMMMMMMMMMMMMMMMMMMMMMMMMMMMMMMMMMMMMMMMMMMMMMMMMMMMMMMMMMMMMMMMMMM"),
    ])
  }
}
#![allow(unused)]
fn main() {
text("Hello world!")
}
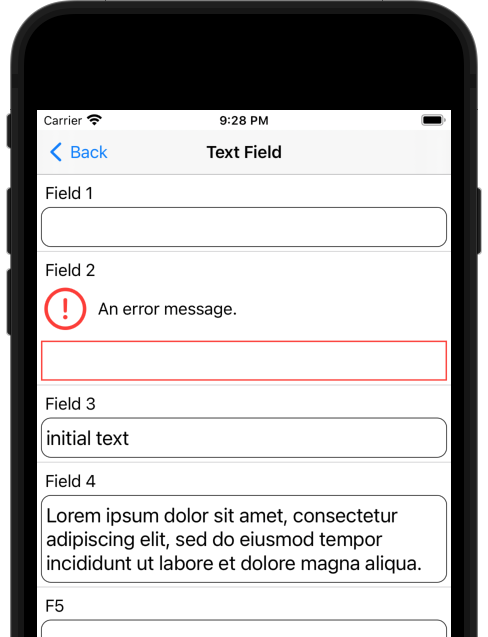
textfield Widget
A textfield widget to displays the value of a string variable. The user can tap the widget to edit the value.
Attributes:
var_name: "var1- Variable name
- Required
initial_string: "initial text- The initial value of the variable, if the variable is unset.
label: "Label1- A label to display next to the textfield.
error: "Message1- A message to display next to the textfield, with an alert icon.
- When this attribute is set, the textfield has a red border.
auto_capitalize: "names"- Automatically capitalize the first letter of each word the user types.
auto_capitalize: "sentences"- Automatically capitalize the first letter of each sentence the user types.
allow: "all"- Allow the user to enter any text and symbols
allow: "ascii"- Allow the user to enter only ASCII text and symbols.
- This disallows emoji and non-English letters and characters.
allow: "email"- Allow the user to enter only text and symbols used in email addresses.
allow: "numbers"- Allow the user to enter only numbers.
allow: "tel"- Allow the user to enter symbols used in telephone numbers.
max_lines: N- Restrict the user from entering more than N lines of text.
poll_delay_ms: 0- Poll (update) the page immediately when the user changes the text.
- Use this for search boxes.
poll_delay_ms: N- Poll (update) the page after the user changes the text and N milliseconds passes.
- Use this to validate text input and show warnings.
Example

# Ruby
nav_page(title: "Text Field") {
  scroll {
    form(widgets: [
      textfield(var_name: "field1", label: "Field 1"),
      textfield(var_name: "field2", label: "Field 2", error: "An error message."),
      textfield(var_name: "field3", label: "Field 3", initial_string: "initial text"),
      textfield(
        var_name: "mmmm",
        label: "Field 4",
        initial_string: "Lorem ipsum dolor sit amet, consectetur adipiscing elit, sed do eiusmod tempor incididunt ut labore et dolore magna aliqua.",
      ),
      textfield(var_name: "field4", label: "F5", allow: ALLOW_NUMBERS),
      textfield(var_name: "field5", label: "F6", allow: ALLOW_ASCII),
      textfield(var_name: "field6", label: "F7", allow: ALLOW_TEL),
      textfield(var_name: "field7", label: "F8", allow: ALLOW_EMAIL),
      textfield(var_name: "field8", label: "F9", auto_capitalize: AUTO_CAPITALIZE_NAMES),
      textfield(var_name: "field8", label: "F10", auto_capitalize: AUTO_CAPITALIZE_SENTENCES),
      textfield(var_name: "field9", label: "F11", max_lines: 1),
      textfield(var_name: "field10", label: "F12", max_lines: 3),
      textfield(
        var_name: "field11",
        label: "Polls page on change",
        poll_delay_ms: 0,
      ),
      textfield(
        var_name: "field12",
        label: "Polls page after change and 1 second delay",
        poll_delay_ms: 1000,
      ),
    ])
  }
}
#![allow(unused)]
fn main() {
nav_page("Text Field", scroll(form((
  textfield("field1").with_label("Field 1"),
  textfield("field2").with_label("Field 2").with_error("An error message."),
  textfield("field3").with_label("Field 3").with_initial_string( "initial text"),
  textfield("mmmm")
  .with_label("Field 4")
  .with_initial_string( "Lorem ipsum dolor sit amet, consectetur adipiscing elit, sed do eiusmod tempor incididunt ut labore et dolore magna aliqua."),
  textfield("field4").with_label("Enter numbers").with_allow( Allow::Numbers),
  textfield("field5").with_label("Enter text").with_allow( Allow::Ascii),
  textfield("field6").with_label("Enter tel").with_allow( Allow::Tel),
  textfield("field7").with_label("Enter email").with_allow( Allow::Email),
  textfield("field8").with_label("Enter name").with_auto_capitalize(AutoCapitalize::Names),
  textfield("field8").with_label("Enter sentences").with_auto_capitalize(AutoCapitalize::Sentences),
  textfield("field9").with_label("Polls page on change").with_poll_delay(Duration::ZERO),
  textfield("field10")
    .with_label("Polls page after change and 1 second delay")
    .with_poll_delay(Duration::from_secs(1)),
))))
}
Actions
Add actions to button widgets and other widgets to let the user initiate actions in the app.
When the user taps a widget, the frontend performs the action list. It performs the actions in order. If it encounters an error while performing an action, it stops.
For example, when performing the action list ["rpc:/save", "pop"],
if the RPC to /save returns an error, the frontend will not pop the page.
Do you need an action that's not here? Please let us know: Feature Requests.
launch_url Action
Use launch_url to launch a URL on the user's device.
The URL can point to a webpage or another app.
Example URLs:
"https://www.example.com/support""mailto:support@example.com?subject=Support&body=Error%20E123"(subject and body are percent-encoded)"tel:+12223334444"sms:+12223334444
More info:
- https://developer.apple.com/library/content/featuredarticles/iPhoneURLScheme_Reference/Introduction/Introduction.html
- https://developer.android.com/guide/components/intents-common.html
Note: Simulator doesn't have email or phone apps so mailto and tel links don't work.
Examples
# Ruby
launch_url("https://www.example.com/support")
#![allow(unused)]
fn main() {
// Rust
use applin::{button, launch_url};
button("Support", [launch_url("https://www.example.com/support")])
}
on_user_error_poll Action
Add on_user_error_poll to the submit button on a form
so the form can show error messages on input widgets.
When the frontend executes an action list, and an action fails,
it stops executing the list.
If the action failed with an HTTP 403 or 422 response,
and the list contains on_user_error_poll,
then the frontend polls the page before displaying the error page.
Examples
# Ruby
on_user_error_poll
#![allow(unused)]
fn main() {
// Rust
use applin::{button, on_user_error_poll, rpc};
button("Signup", [rpc("/signup"), on_user_error_poll()])
}
poll Action
Use poll to update the page based on page data or backend data.
To execute the action, the frontend re-fetches the page from the server and then smoothly updates the displayed page to match the new version it received.
It shows the "Working" modal.
If the page has any variables, the frontend uses an HTTP POST and includes the variables and their values in a JSON object request body.
Examples
# Ruby
poll
#![allow(unused)]
fn main() {
// Rust
poll()
}
pop Action
Use pop to remove the current page from the stack.
The nav_page default Back button performs this action.
If the current page is the only page on the stack, this action displays an error.
Examples
# Ruby
pop
#![allow(unused)]
fn main() {
// Rust
pop()
}
push Action
Use push to add a page to the top of the stack, making it visible.
If the specified page is already visible, this action display an error.
Examples
# Ruby
push("/page2")
#![allow(unused)]
fn main() {
// Rust
push("/page2")
}
replace_all Action
Use replace_all to remove all pages on the stack and replace them with the specified page.
Login pages can use this to show the home page after login.
Examples
# Ruby
replace_all("/")
#![allow(unused)]
fn main() {
// Rust
replace_all("/")
}
rpc Action
Use rpc to send the page's variables to the backend in an HTTP POST.
Specify the URL of the backend endpoint.
If the backend returns HTTP 422 Unprocessable Content
with a text/plain body,
the frontend displays the body to the user in an error screen.
Examples
# Ruby
rpc("/login")
#![allow(unused)]
fn main() {
// Rust
rpc("/login")
}
Submitting Data
Coming soon...
Manual Testing
Applin Tester
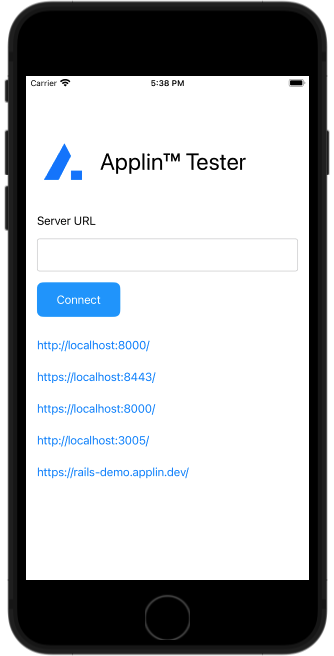
- Install Applin Tester on any iOS device
- Enter the URL of your backend and tap "Connect"
You can make custom URLs that open Applin Tester to a particular page.
The format of the URL is applin:BASE_URL/?p=PAGE1&p=PAGE2.
Use p query parameters to specify stack page keys.
Example: applin:https://rails-demo.applin.dev/?p=/&p=/text_page
If you have Applin Tester installed, this link will open Applin Tester, connect to the Rails Demo, and display the "Text" page, with the home page under it.
Example App
Download an example app and point it at your backend. See iOS Frontend.
Automated Testing
Coming soon...
Releasing
iOS
- Create your Team in your Apple Developer account.
- Change your app's Team
- Open the Project Navigator
- Click on the app name at the top of Project Navigator
- Click the app name under TARGETS
- Click the "Signing & Capabilities" tab
- Change "Team" to your Team identifier.
- Edit
Main.swift- Set
licenseKey. Release builds do not start when this is missing or incorrect.
- Set
- TODO: Add more details.
Support
If you have questions about how to use Applin, please create a ticket at https://github.com/leonhard-llc/applin-support/issues
You can hire me to train your team on Applin and support your team's use of Applin.
Please email me to start a conversation about your needs: info@leonhardllc.com.
--Michael Leonhard (Applin creator)
Related:
Reporting Bugs
Please create an Issue ticket in the relevant GitHub repository.
Pleae include this information
- What you expected to happen
- What actually happened
- How to reproduce the behavior
- Any workarounds you found
If someone has already posted about the problem, please post a comment with the above information.
I am eager to make Applin work well for you. Thank you for taking the time to report problems you have with Applin!
-Michael Leonhard (Applin founder)
Feature Requests
Please create a ticket at https://github.com/leonhard-llc/applin-support/issues
Pleae include this information
- What you are trying to accomplish
- How the feature will work
- Alternatives you considered
- The URL of your app, if any
If someone has already requested the same feature, please post a comment with the above information.
I am eager to make Applin work well for you. Thank you for taking the time to tell me your needs!
-Michael Leonhard (Applin founder)
Appendix
Frontend-Backend Protocol
Applin frontends and backends communicate with JSON and HTTP. The protocol incorporates the core concepts of REST.
Pages and URLs
Every Applin app is accessible at a particular base URL
with the form https://HOST/PATH.
The URL must not contain query or fragment components.
Every Applin app page has a URL. All page URLs are relative to the base URL.
The default "home page" is at relative URL /.
Applin frontends display pages only from the base URL. They do not fetch pages from other servers or URLs. To display content from another server, have your server fetch the content.
For example, if your app's base URL is https://apps.example.com:1234/travel
then the page /hotels has URL https://apps.example.com:1234/travel/hotels.
Frontend Role
Every Applin frontend is a program that makes requests to a particular Applin server, receives page specifications from the server, and provides functions for interacting with pages and navigating between pages.
Request types:
GETfor a page the frontend has not previously requested- Request headers
Accept: application/vnd.applin_responseSee Accept on MDN.
- Request headers
GETto refresh a page that has no variables- Request headers
Accept: application/vnd.applin_response
- Request headers
POSTto refresh a page that has variables (user-input widgets).- Request headers
Accept: application/vnd.applin_responseContent-Type: application/jsonrequest header
- Request body is a JSON object with the current page's variables.
- Request headers
POSTfor anrpcaction on a button.- Request headers
Content-Type: application/jsonrequest header
- Request body is a JSON object with the current page's variables.
- Request headers
GETfor page content (images, etc.)
Server Role
Every Applin server is an HTTP server that handles requests.
- Requests for pages, when request has the
Accept: application/vnd.applin_responseheader- Response headers
Content-Type: application/vnd.applin_response- Response code:
200 OK - Response body is a JSON object with the format described below.
- Do not return 4xx errors for bad user input. Instead, display problems on the page.
- Response headers
- Form POST (without
Accept: application/vnd.applin_response)- Response code:
200 OK - No response body
- When the request is missing a required variable, or a variable has the wrong type
- Response code:
400 Bad Request - Response headers:
Content-Type: text/plain - Response body: technical details about the problem
- Response code:
- When the user entered data that is unacceptable
- Response code:
422 Unprocessable Content - Response headers:
Content-Type: text/plain - Response body: a message for the user
- Response code:
- Response code:
- When the user is not logged in (session cookie missing or invalid) or does not have permission to view the page
- Response code:
403 Forbidden - Response headers:
Content-Type: text/plain - Response body: a message for the user
- Response code:
- When the server failed to process the request
- Response code:
500 Internal Server Error - Response headers:
Content-Type: text/plain - Response body: technical details about the problem
- Response code:
- When the server is overloaded
- Response code:
503 Service Unavailable - No response body
- The frontend will retry with backoff.
- Response code:
Applin frontends receive and send cookies like web browsers. Servers can set and receive cookies for session tokens. See Cookies on MDN.
Applin Request Format
The application/json content-type is a
JSON object encoded in a UTF-8 string.
It contains key-value pairs for all data-entry widgets on the page.
Applin Response Format
The application/vnd.applin_response content-type is a JSON object encoded in a UTF-8 string.
It must include these keys:
pageis an Applin page specification
Example Exchange
Frontend request:
GET /new_account HTTP/1.1
Server response:
HTTP/1.1 200 OK
Content-Type: application/vnd.applin_response
{
  "page": {
    "typ": "nav_page",
    "title": "New Account",
    "widget": {
      "typ": "scroll",
      "widget": {
        "typ": "form",
        "widgets": [
          {
            "typ": "textfield",
            "label": "Username",
            "var_name": "username"
          },
          {
            "typ": "nav_button",
            "text": "Terms",
            "actions": [
              "push:/terms"
            ]
          },
          {
            "typ": "nav_button",
            "text": "Privacy",
            "actions": [
              "push:/privacy"
            ]
          },
          {
            "typ": "checkbox",
            "text": "I agree",
            "var_name": "agree"
          },
          {
            "typ": "form_button",
            "text": "Create Account",
            "actions": [
              "rpc:/create_account",
              "replace_all:/"
            ]
          }
        ]
      }
    }
  }
}
Frontend shows the page:
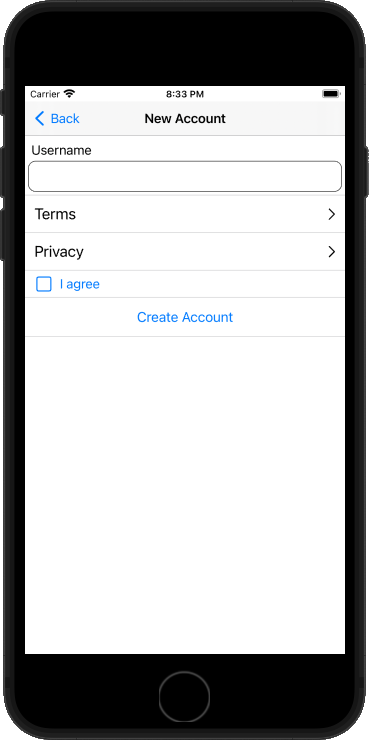
User enters user1 in the text box, checks the "I agree" box, and clicks the "Create Account button".
Frontend performs the first action on the button, "rpc:/create_account", by sending this request:
POST /create_account HTTP/1.1
content-type: application/json
{"agree":true,"username":"user1"}
Server responds with
HTTP/1.1 200 OK
Frontend receives this successful response and then performs the next action on the button,
"replace_all:/", removing all visible pages and showing the home page.
Optional - Storyboard Launch Screen
The example app template uses an image for the launch screen. If you want a fancier launch screen, follow these instructions to replace it with a storyboard launch screen.
Note: XCode's storyboard editor is difficult to use.
If you just want to add some text to your launch screen, try adding it into your logo.png.
- Delete the
Launch Screenkey fromInfo.plist - Right-click on "Info.plist" in the Project Navigator and choose "New File"
- Select
iOSandStoryboardand clickNext - Name the file
LaunchScreenopen the storyboard and add the logo:
- Select
- Click
+at the top-right of the screen - Drag
Image Viewonto the empty app screen. Drop it in the center of the screen. - In the "Attributes Inspector" column on the right-hand side, change "Image" to
logo.png - Click the unlabeled "Align" button, near the bottom of the window. "Add new alignment constraints" pops up.
- Check
Horizontally in Container - Check
Vertically in Container - Click
Add 2 Constraints
- Check
- Click the unlabeled "Add New Constraints" button, near the bottom of the window. "Add New Constraints" pops
up.
- Check
Widthand enter200in the box - Check
Aspect Ratio - Click
Add 2 Constraints
- Check
- Select
View Controller Scene, then click the unlabeled "Show the Attributes Inspector" button in the right-hand pane. Then check theIs Initial View Controllercheckbox. - Open target configuration,
Generaltab, and change "Launch Screen File" toLaunchScreen.storyboard.
Optional - Recreate Example App
This section shows how to make a new XCode project and turn it into an Applin frontend.
Note: This is the slow way to make a new app. The fast way is to follow the instructions in iOS Frontend.
1. Create XCode Project
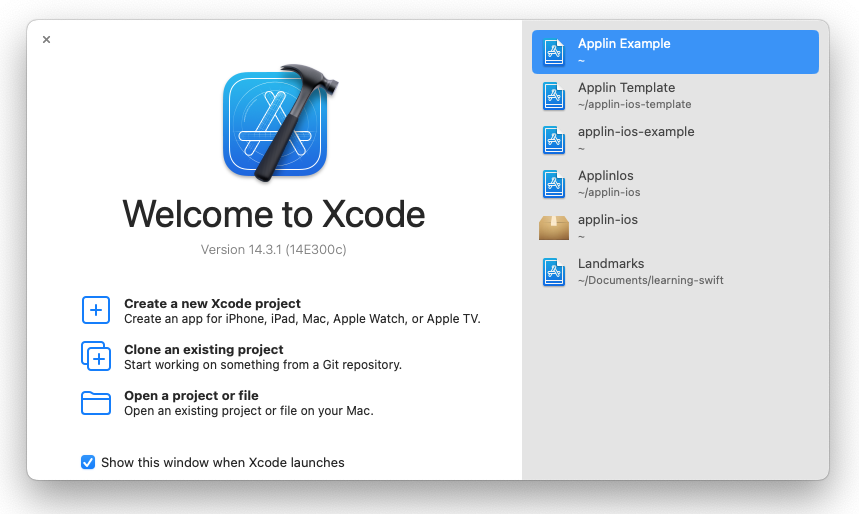
- Open XCode
- "Welcome to Xcode"
- Click
Create a new XCode project
- Click
- "Choose a template for your new project"
- Select
iOS - Select
App - Click
Next
- Select
- "Choose options for your new project"
- Enter your app's name
- Select your Apple Developer team account.
- Select
Storyboardinterface - Select
Swiftlanguage - Click
Next
- Select the directory to hold the new app directory. Click "Create".
2. Update Files
Xcode's left-hand panel is a tab view displaying "navigators".
To display the Project Navigator, click the left-most icon or select View > Navigators > Project from the menu.
DeleteandMove to Trasheach of these itemsAppDelegateSceneDelegateViewControllerMainLaunchScreen
- Add
logo.png- Save logo.png to your computer
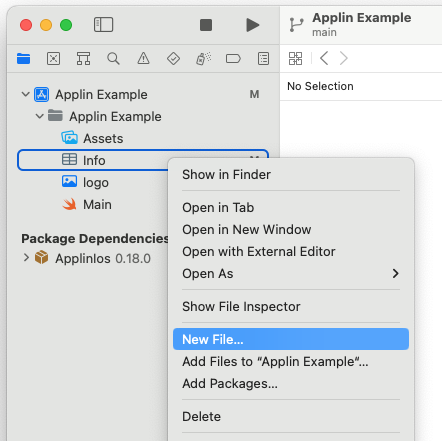
- In the Project Navigator, right-click on "Info", and click
Add Files to "App Name"...and add thelogo.pngfile you saved.
- Add
Main.swift- In the Project Navigator, right-click on "Info", and click
New File - "Choose a template for your new file" modal appears
- Select
iOS - Select
Swift File - Click
Next - Type
Maininto the "Save As" box - Click
Create
- Select
- "Would you like to configure an Objective-C bridging header?" modal appears
- Click
Don't Create
- Click
- The middle panel shows "Main". Replace the contents with https://github.com/leonhard-llc/applin-ios-example/blob/main/Applin%20Example/Main.swift.
- In the Project Navigator, right-click on "Info", and click
3. Update Configuration
- Add ApplinIos package
- Right-click anywhere in the Project Navigator and click
Add Packages - Paste
https://github.com/leonhard-llc/applin-ios.gitinto the search box - The right panel will show "applin-ios"
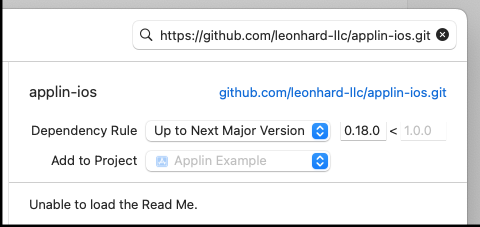
- Click
Add Package - "Choose Package Products for applin-ios" modal appears.
1.Click
Add Package
- Right-click anywhere in the Project Navigator and click
- Use
logo.pngas the launch screen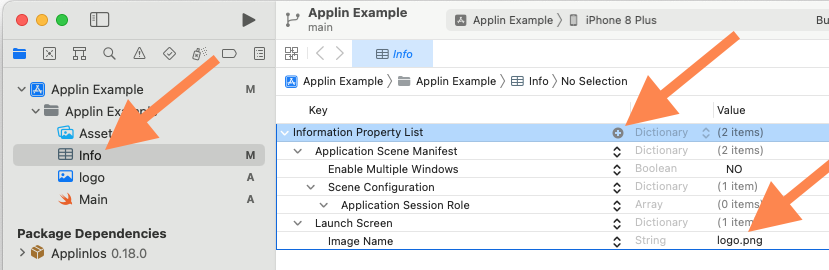
- In Project Navigator, click on
Info - Add the row "Information Property List" > "Launch Screen"
- Click the
+button to add a row
- Click the
- Change the value of row "Information Property List" > "Launch Screen" > "Image Name" to
logo.png
- In Project Navigator, click on
- Stop UIKit from trying to load "Main" storyboard
- In Project Navigator, click on
Info - Delete the row "Information Property List" > "Application Scene Manifest" >
"Scene Configuration" > "Application Session Role" > "Item 0 (Default Configuration)"
- Hover over the row and click the
-button to delete the row
- Hover over the row and click the
- In Project Navigator, click on
- Allow app to run on iOS 15 (iPhone 6S) and newer
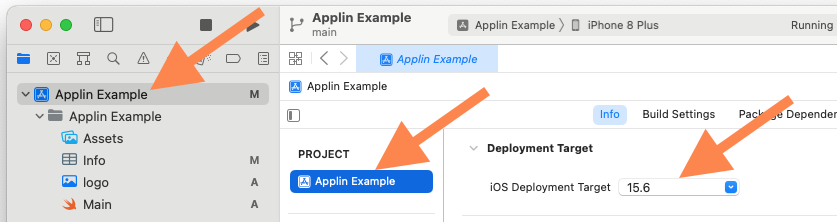
- Open project configuration
- In Project Navigator, click on the project, which is top-most item in the Project Navigator It has a blue App Store icon.
- Under "PROJECT", click on the app name
Infotab- Change "iOS Deployment Target" to
15.6. This supports iPhone 6S and newer.
- Change "iOS Deployment Target" to
- Open project configuration
- Remove unused storyboard settings
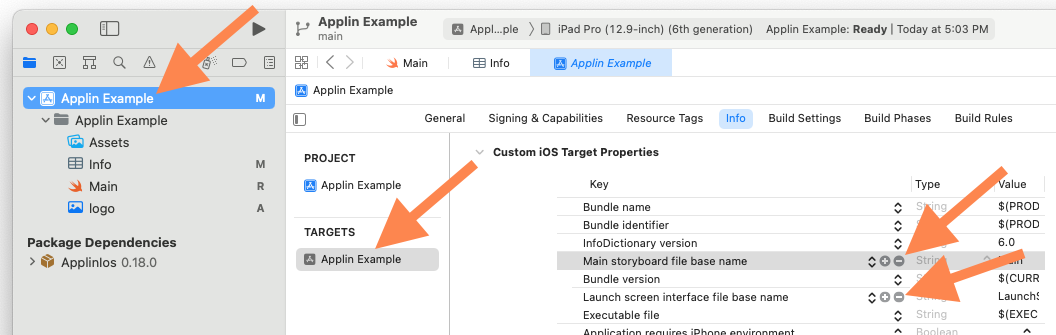
- Open target configuration
- In Project Navigator, click on the project, which is top-most item in the Project Navigator It has a blue App Store icon.
- Under "TARGETS", click on the app name
Infotab- Delete these rows:
- "Main storyboard file base name"
- "Launch screen interface file base name"
- Delete these rows:
- Open target configuration